
Home Automation Installation Guide for a Smarter Home
Home automation installation sounds more complicated than it usually is, but getting it wrong is easy and expensive. Devices that refuse to talk to each other, dead Wi-Fi zones in the middle of the house, and a hub that maxes out after ten devices are all preventable problems. Most of them come from buying hardware before having a plan. This guide walks through every stage of a smart home system installation, from understanding the basics to integrating energy management, with the practical detail that actually makes the difference between a system that works reliably and one that becomes a frustrating side project.
What Is Home Automation and How Does It Work?
At its simplest, home automation means devices that would normally require manual interaction can respond to conditions, schedules, or remote commands instead. The lights turn on when someone walks in. The thermostat adjusts before anyone gets home. The front door locks itself at 10 pm. None of that requires anyone to flip a switch or tap an app.
What makes it work is a central hub. Think of it as a translator and coordinator sitting in the middle of the network. Smart devices report their status to the hub and receive commands from it. The hub also listens for triggers: a sensor detects motion, a schedule hits, an app sends a command. Whatever actions were programmed then execute automatically.
Most of this communication happens wirelessly. Zigbee and Z-Wave build a mesh network where devices pass signals to each other, which is more reliable than depending on a strong Wi-Fi signal at every corner of the house. Wi-Fi-based devices skip the hub for simple setups but draw more power and require a solid signal everywhere they are installed. A newer protocol called Matter is worth knowing about because it is backed by Apple, Google, Amazon, and Samsung, and is designed to make cross-brand compatibility much less painful than it has historically been.
The control layer sits on top of all of this. A phone app, a wall keypad, a voice assistant, or all three can all send commands to the same hub. Well-configured systems respond to any of them equally well.

Essential Components of a Home Automation System
Before buying anything, it helps to know what each component actually does and why it matters for the system as a whole.
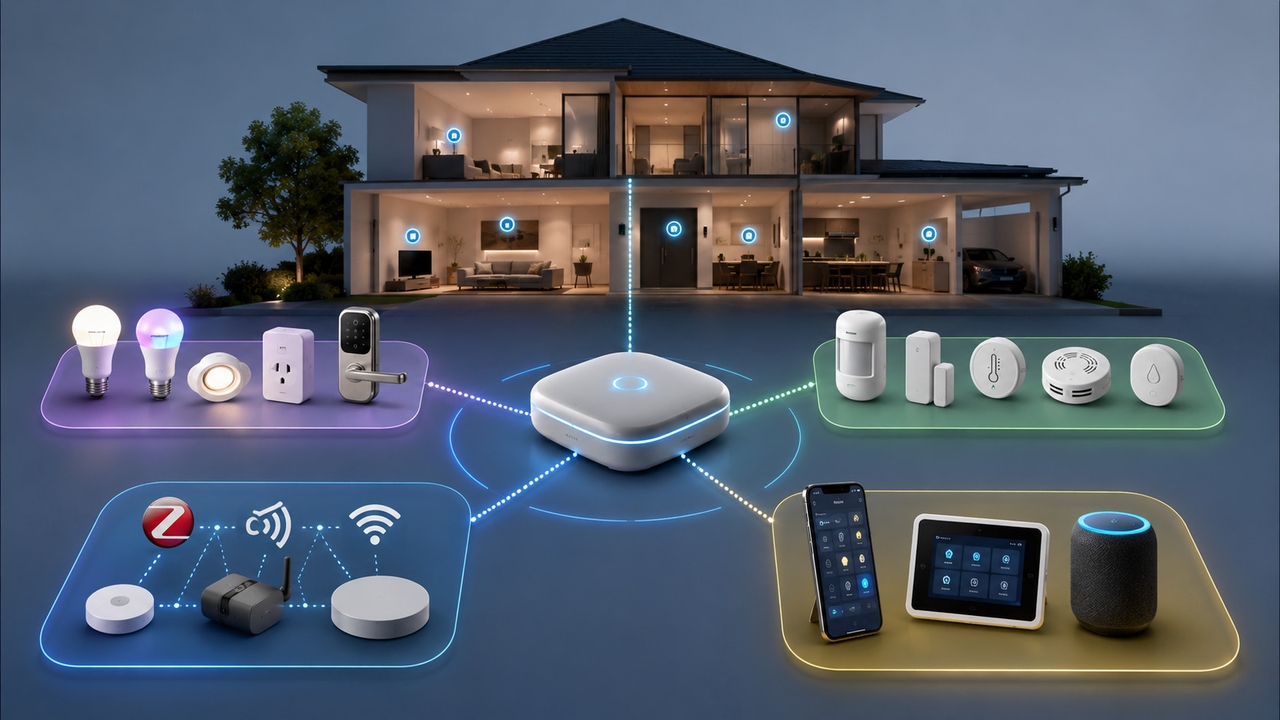
Central hub or controller: Everything else depends on this choice. Samsung SmartThings, Apple HomeKit, Amazon Echo, and the open-source Home Assistant platform are the most widely used options. The hub determines which protocols the system supports and which third-party devices are compatible. Picking it first, then choosing devices that match, prevents the most common and costly mistake in smart home setup.
Smart devices and actuators: These are the physical things that do something: bulbs that dim, plugs that cut power, locks that engage, blinds that close, thermostats that adjust. Every device needs to speak the same protocol language as the hub, or be bridge-compatible with it.
Sensors and detectors: Motion sensors, door and window contacts, temperature sensors, water leak detectors, light sensors. These are the inputs. They detect what is happening in the real world and feed that information to the hub, so automation rules can respond to actual conditions rather than just a fixed schedule.
Communication protocols: Zigbee and Z-Wave both create self-healing mesh networks, meaning if one device drops off, signals route around it. Neither requires a strong central Wi-Fi signal at every device. For large installations or homes with thick walls, mesh protocols are significantly more reliable than Wi-Fi-only setups.
Control interfaces: The smartphone app is the minimum baseline. Wall-mounted touchscreens near entry points add convenience. Voice assistants handle hands-free moments. Systems that support all three give the most flexibility without sacrificing reliability if one channel is unavailable.
Home Automation System Installation: Step by Step
Step 1: Create a Device and Network Map
Sketch the floor plan and mark every location where a device will be installed. Note where the Wi-Fi signal is weak, where power outlets are, where the main panel is, and where sensors would logically sit to cover entry points and high-traffic areas.
Then list every planned device, what protocol it uses, and whether it connects directly to Wi-Fi or needs the hub as an intermediary. Doing this on paper first catches incompatibilities before they show up as returned hardware. It also identifies rooms where a Zigbee or Z-Wave repeater might be needed to extend the mesh.
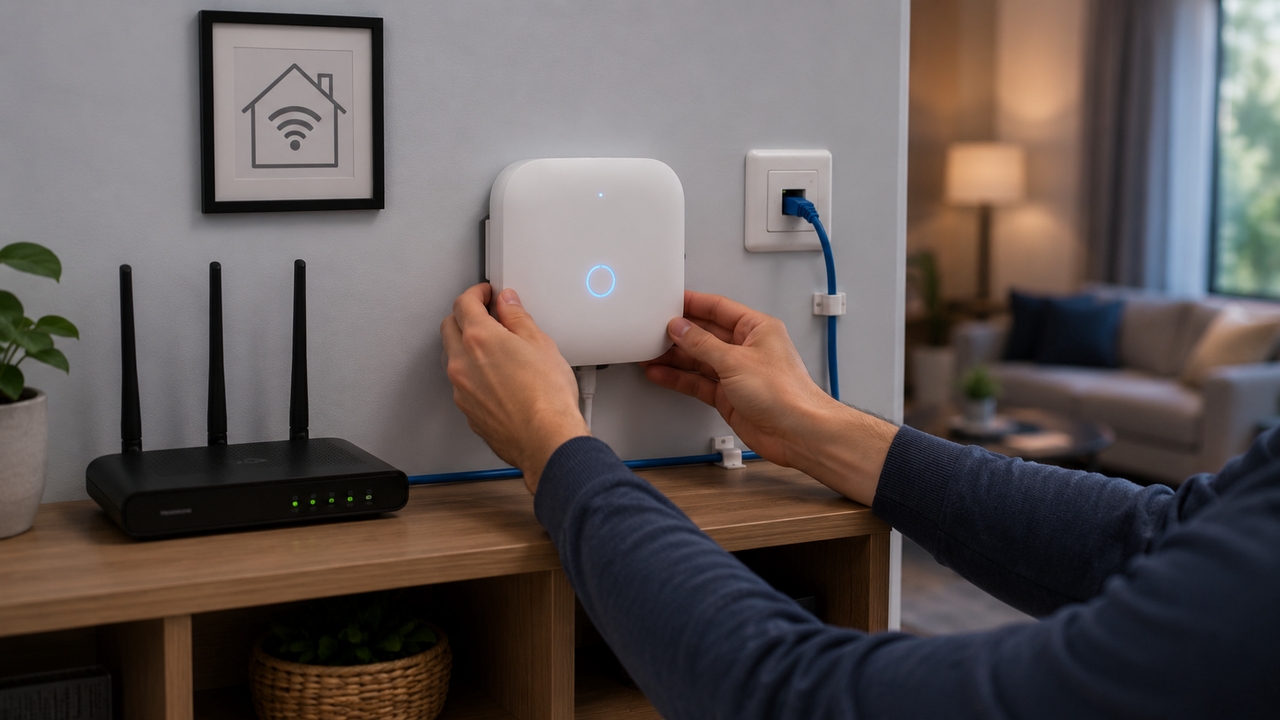
Step 2: Install the Central Hub
Central location matters more than most guides emphasize. A hub sitting in a corner of a large house on Wi-Fi performs noticeably worse than one near the network switch on a wired ethernet connection. Ethernet is more stable, lower latency, and removes one variable from any connectivity troubleshooting later on.
Once in place, run through the manufacturer's setup process to connect the hub to the home network and configure a remote access account. For Zigbee or Z-Wave setups, a centrally located hub also serves as the strongest anchor point for the mesh, giving every device the shortest possible signal path.
Step 3: Connect Smart Devices
Room by room works better than all at once. Starting with one room, pair each device through the hub's app. Most pairing processes involve holding a button on the device until an indicator light changes, then confirming in the app. Verify each one responds correctly before moving to the next.
For Zigbee or Z-Wave networks, install mains-powered plug-in devices first. Smart outlets and plug-in smart switches form the backbone of the mesh because they always have power to repeat signals. Battery-powered devices connect through them. Getting the backbone in place before adding battery sensors means the mesh is already strong when the more range-sensitive devices go in.
Step 4: Configure Automation Rules and Scenes
This is where the installation becomes a smart home rather than just a collection of remotely controlled devices. Automation rules link conditions to actions: motion in the hallway triggers the hallway light, sunset triggers outdoor lighting, a door opened after 11pm sends a phone alert. Scenes group multiple device states under a single command: "Leaving" could lock the front door, lower the thermostat, turn off all lights, and arm the security mode simultaneously.
Build simple rules first. A reliable foundation of basic automations reveals how the system behaves before adding complex multi-condition logic on top of it.
Step 5: Test Device Communication
Walk the whole house and trigger every sensor manually. Open doors, trip motion detectors, test lights in every room. Check that automation rules fire correctly by simulating the trigger conditions in the hub app. Any device that responds slowly or inconsistently usually has a signal path problem, either too far from the nearest mesh node or running through interference. A repeater or additional plug-in device in that area typically resolves it.
Testing remote access from outside the home Wi-Fi confirms the hub's cloud connection works for away-from-home control, which is often where people discover firewall or port issues on first setup.
Step 6: Optimize Performance and Security
Change every default password on every device before calling the installation complete. The vast majority of smart home security incidents come from devices running factory credentials. Put smart home devices on a separate network segment or guest network, isolating them from computers and phones that handle sensitive information.
Enable two-factor authentication on the hub account. Set up automatic firmware update notifications and run updates within a day or two of release. A hub that is three firmware versions behind has likely missed at least one meaningful security patch.
Integrating Energy Management Into Your Smart Home
Why Energy Monitoring Matters
Smart lighting and temperature control are the visible wins from home automation. Energy management is where the financial returns get serious. US electricity rates have climbed steadily over the past decade, and most households have no real visibility into which devices are consuming power or when.
A smart outlet with energy monitoring tells exactly how much a device draws at rest versus in active use. A whole-home energy monitor shows the full picture in real time: which circuits are pulling load, when consumption peaks, and whether anything is drawing significant standby power overnight. That visibility turns abstract electricity bills into something actionable.
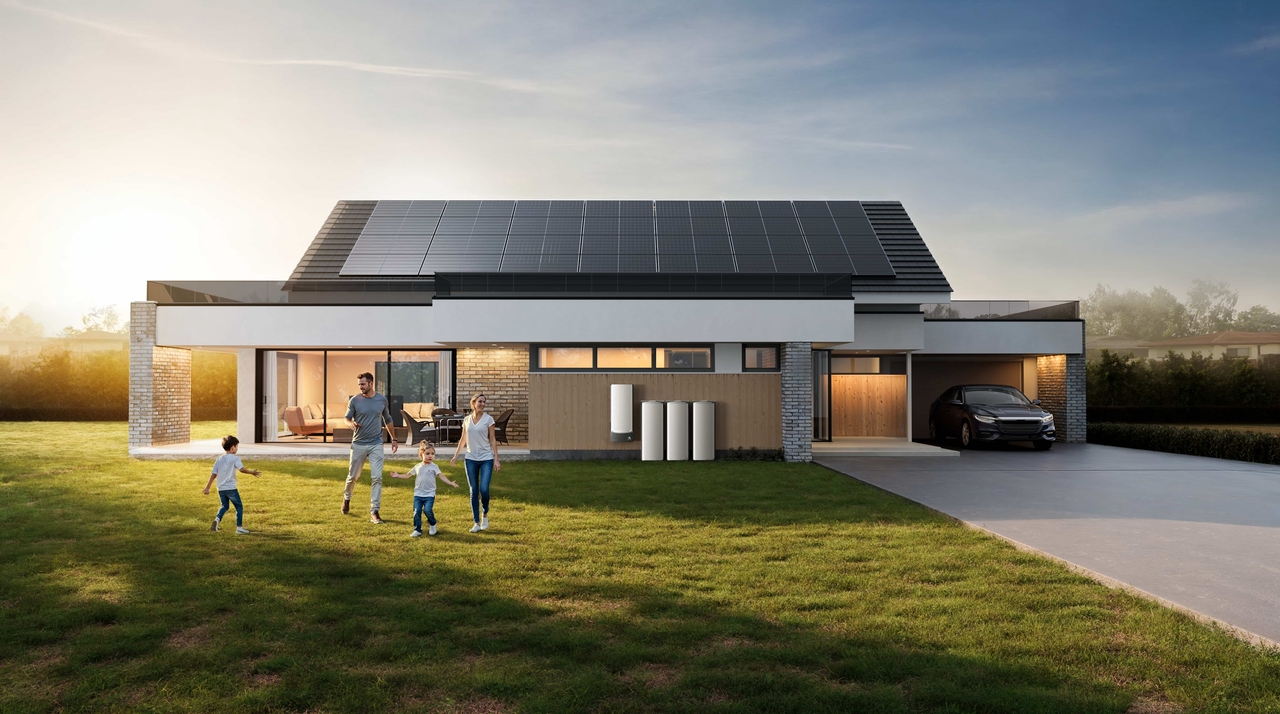
Connecting Solar and Battery Systems to Home Automation
Adding solar and battery storage to a smart home setup changes what automation rules can meaningfully do. When the system can see that panels are generating surplus power, an automation rule can start the dishwasher or charge the EV right then, consuming clean energy at no grid cost instead of feeding it back at low export rates.
The same logic applies in reverse. When battery storage is running low during an outage, load management automations can shed non-essential circuits to extend runtime for the things that actually matter. Monitoring, production visibility, and automated responses make energy storage genuinely smarter rather than just a passive backup.
Using EcoFlow OCEAN Pro for Smart Energy Management
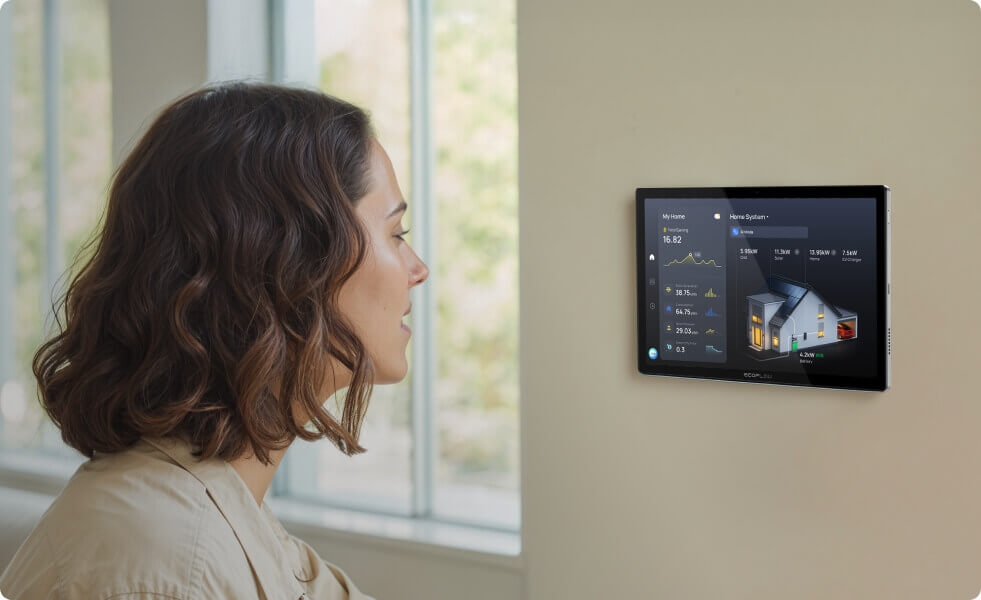
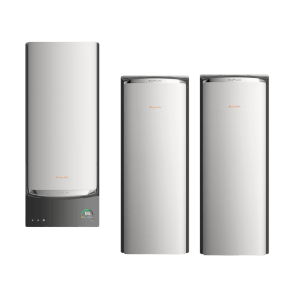
For households with whole-home solar and battery systems, the EcoFlow OCEAN Pro Solar Battery System functions as the energy hub that ties all of those inputs together under a single platform.
Real-time visibility across solar production, battery state, grid supply, and household consumption replaces the fragmented picture that comes from managing separate monitoring apps. When paired with the OCEAN Smart Electrical Panel 40, the system coordinates load management at the circuit level, automatically drawing from battery during peak utility rate windows, pre-charging before incoming storms, and running off-peak charging cycles without any manual scheduling.
Storage scales from 10kWh to 80kWh modularly, continuous output reaches 24kW, and the built-in Intelligent Mode handles TOU optimization automatically. For a smart home built around both convenience and energy independence, this kind of integrated management completes what device automation alone cannot cover. A broader look at home battery backup options is worth exploring when planning this layer of the system.
Best Practices for a Successful Smart Home Automation Installation
Prioritize interoperability. Confirm every device works with the chosen hub before purchasing. The Matter standard is making this easier, but not everything supports it yet. Checking compatibility before buying takes minutes and prevents returns.
Secure the smart home network. A separate VLAN or guest network for smart devices limits exposure if any device is compromised. Two-factor authentication on the hub account and changed default passwords on every device close the most common attack paths.
Plan for future expansion. Choose a hub rated well above the immediate device count. A platform that supports hundreds of devices leaves room to grow without infrastructure changes. Plan network access point coverage for rooms that might get devices added later.
Keep firmware and software updated. Smart device manufacturers push firmware updates that patch security issues and fix reliability bugs. A monthly check of device firmware statuses keeps the system current. Leaving known vulnerabilities open for months is common and avoidable.
Regularly review automation rules. Seasons change, routines shift, new devices get added. Automation rules that made sense six months ago sometimes conflict with current conditions. A quarterly review catches stale or conflicting rules before they create frustrating behavior.
Conclusion
A smart home that works well is not about having the most devices. It is about having the right devices, on a compatible protocol, managed by a hub with room to grow, on a secure network with automation rules that reflect how the household actually lives.
Starting with clear goals and a device map avoids most of the friction that derails smart home projects. Building incrementally, testing each stage before adding more, and keeping the network and firmware current keeps the system stable over time.
For households ready to bring energy independence into the picture alongside device automation, solutions like the EcoFlow OCEAN Pro build a resilient energy foundation that the smart home can fully leverage. Control over lighting and climate is useful. Control over energy production, storage, and costs is what turns a smart home into a genuinely self-sufficient one.
Request a consultation with an EcoFlow energy advisor to bring the energy management layer into the smart home plan.
Get Your Free Home Energy Consultation!
Which energy solution are you interested in?
FAQs
What is home automation installation?
It is the process of setting up smart devices, sensors, and a central hub so they communicate and respond automatically. The work includes physical installation, network setup, hub configuration, and building the automation rules that make devices respond to real conditions.
How much does it cost to install a smart home system?
Costs range from $500–$1,000 for basic DIY setups covering smart bulbs, a thermostat, and a hub. Professionally installed entry-level systems start at $2,000–$5,000. Comprehensive systems with security, climate, and energy management typically run $5,000–$15,000 depending on home size and scope.
Is home automation installation difficult?
Consumer platforms like SmartThings, HomeKit, and Google Home are manageable for most people comfortable with basic tech setup. Work involving the main electrical panel, structured wiring, or whole-home energy systems requires a licensed electrician. The setup itself is doable; the wiring behind the wall is not a DIY task.
Can I add more devices to my smart home after installation?
Absolutely, and planning for it upfront makes it easier. Choosing a hub with a high device ceiling and leaving network capacity headroom means adding devices later requires no infrastructure changes, just pairing them through the app.
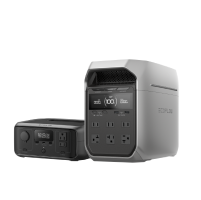
Does my smart home still work during a power outage?
Standard smart devices lose power along with the grid. A home battery backup changes that. The EcoFlow OCEAN Pro, for example, switches to battery power in under 10 milliseconds, keeping the hub, router, and connected devices running through outages so the smart home stays fully operational even when the grid is down.
